Creating an AWS scheduler to control the start and stop time of your database achieves a reduction of the cost that comes with holding up active resources. You don’t need all your databases running 24/7, and you manually choosing when to stop the DB is not an ideal long-term solution. Fortunately, you can schedule the activity of your database without manual interference.
Unlike the very simple option of stopping your DB through the AWS console, this process would be a bit more detailed. The added advantage of a flexible AWS schedulerand not having to worry about the DB starting automatically a week later makes the small process more worth it.
How to Write an AWS RDS Stop Instance Function on Lambda?
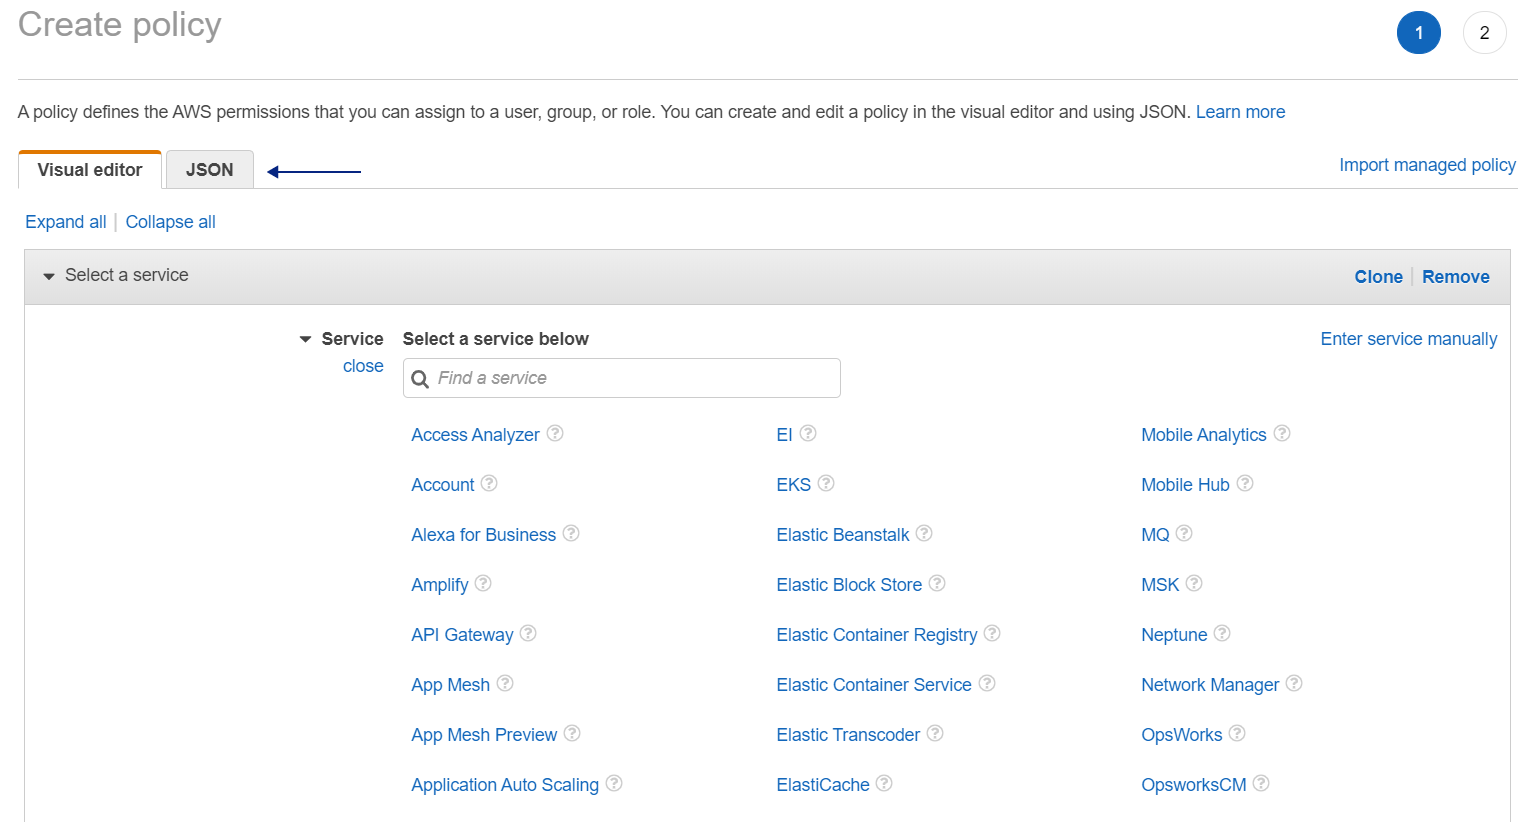
Create a policy
First, we must create a policy for the IAM role to be attached to.
Go to the AWS console
Choose IAM service
Click on Policies
Click on Create Policy
Click on the JSON tab and paste the JSON shown below to gain access to certain RDS actions and Cloud Watch Log Events
AWS has a visual editor for creating the policy but you can just copy-paste the JSON code below for your convenience.
Give the policy a name, manual_RDS_Schedule and add a description. Click on ‘Create Policy’
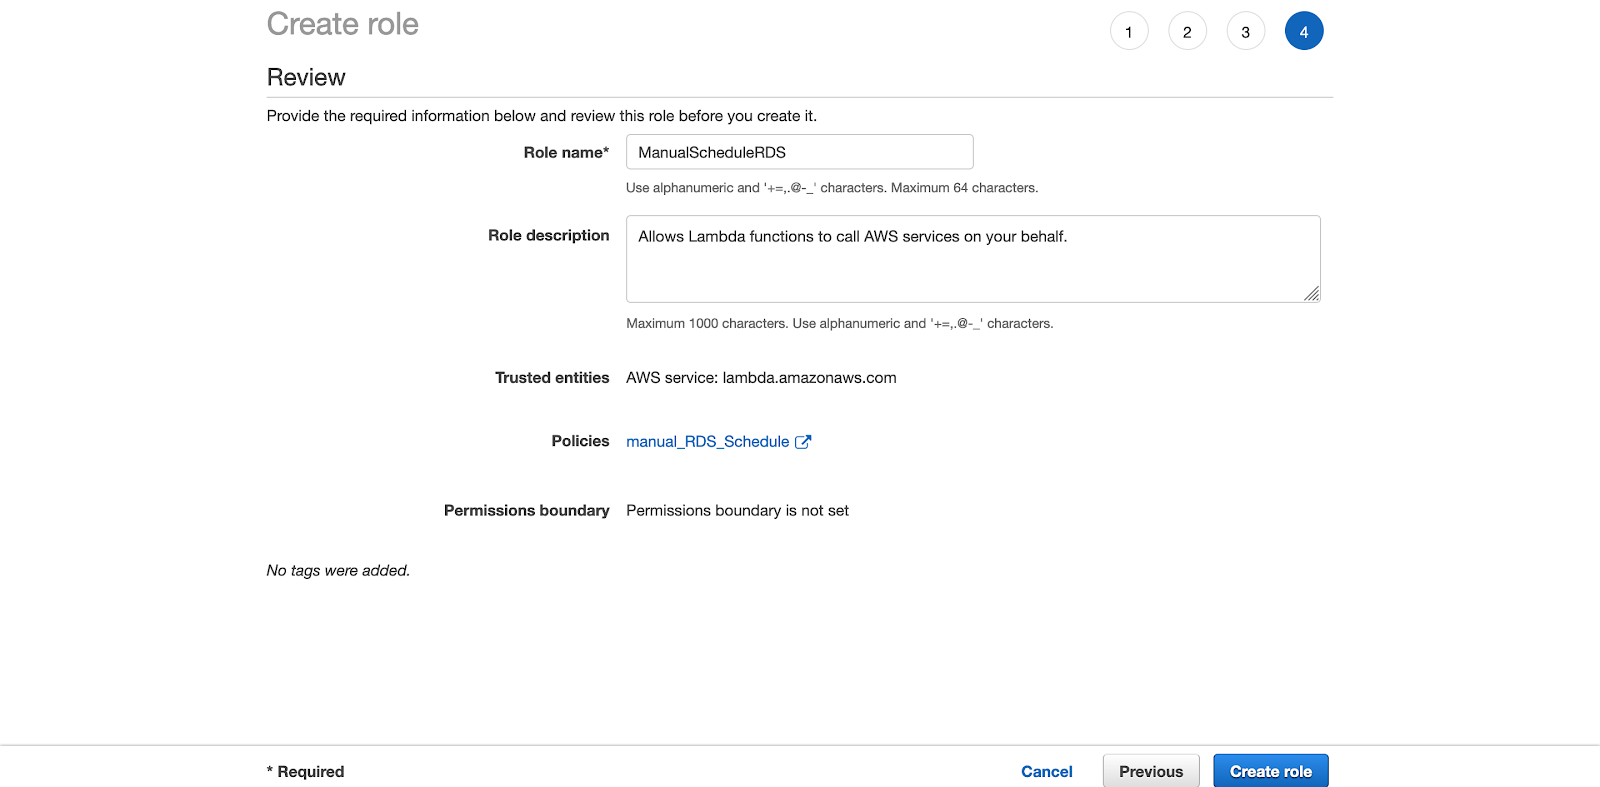
Create a role
The IAM role will allow making service requests which are necessary for scheduling the AWS RDS stop instance, it also grants access to CloudWatch logs.
Go to the IAM console
Go to Roles
Click on Create Roles
Choose Lambda in the AWS Service section
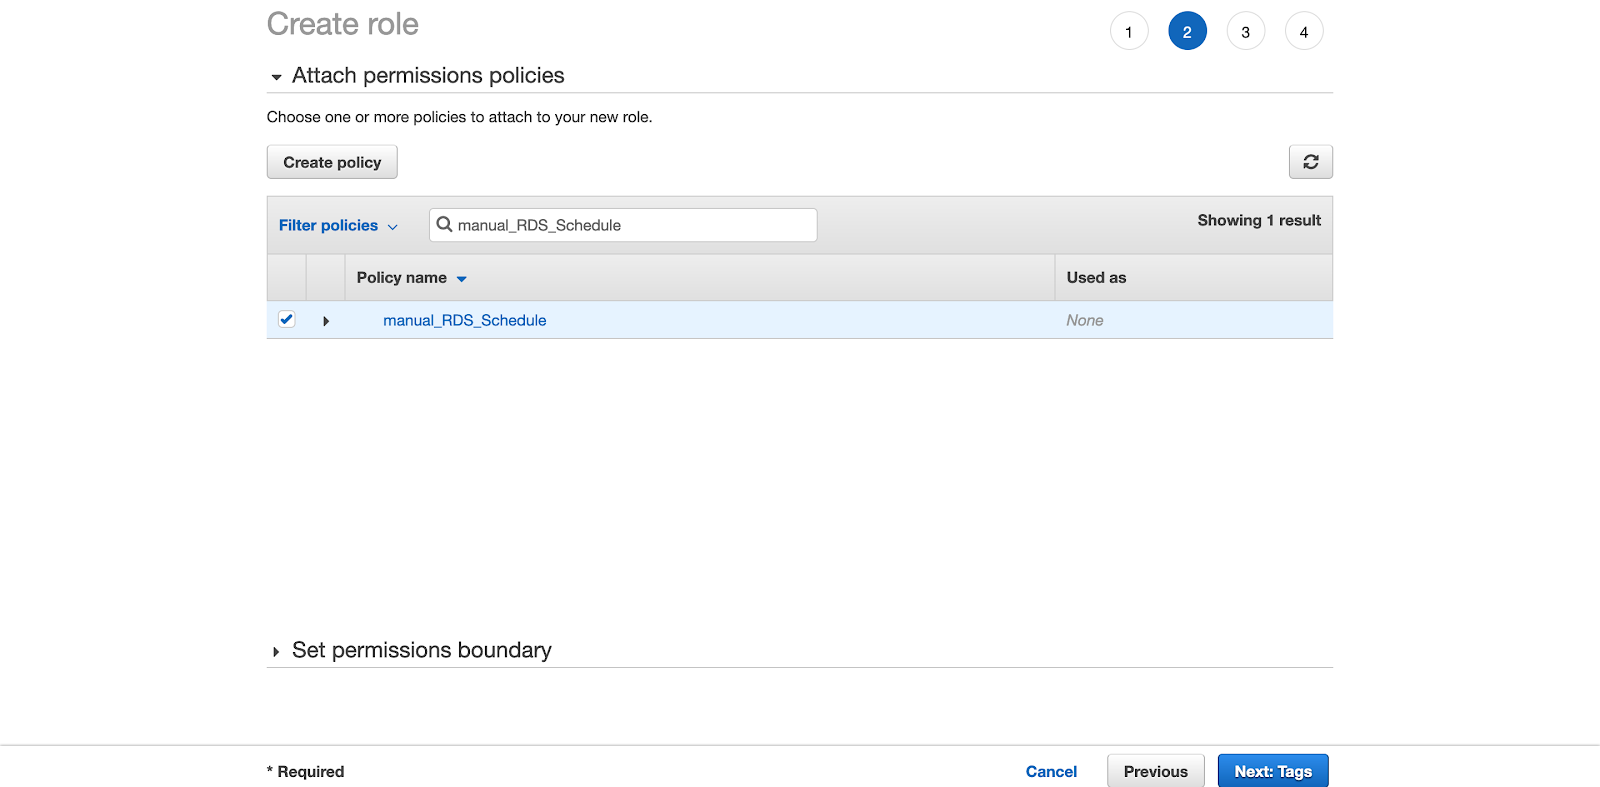
Search for Policy_ on the search bar and the policy you constructed earlier will pop up.
Give the role a name, ManualScheduleRDS and click Create Role.
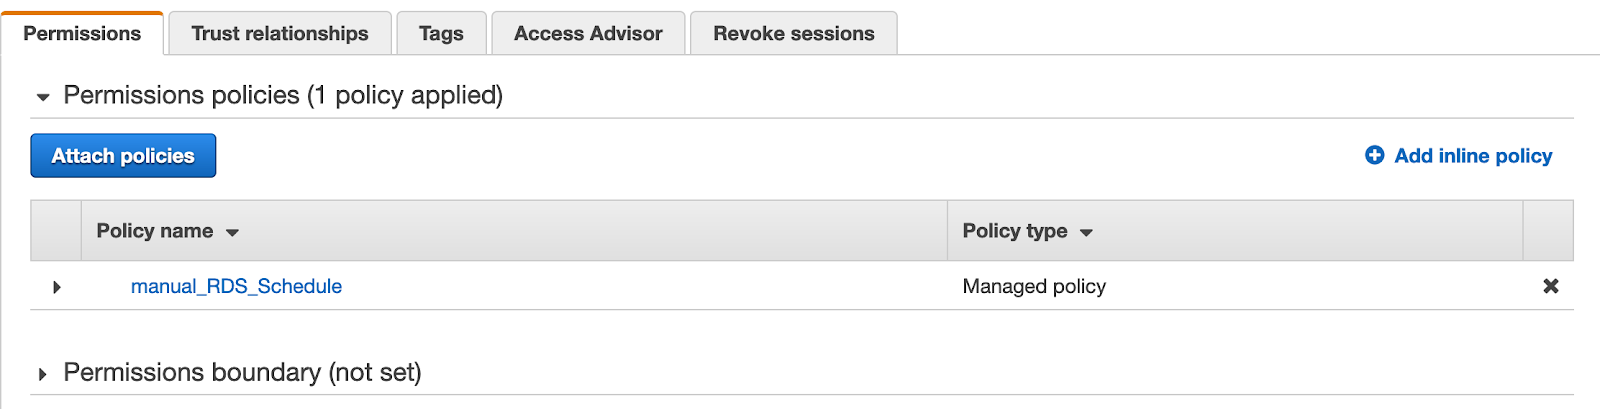
Attach the policy, manual_RDS_Schedule to the role
Create the AWS Lambda function
Before creating a Lambda function, make sure your region is the same as the region where you created the DB instance.
Since you can control instances in multiple regions, choosing the right region is necessary for the function to work. You could use the same function later on for your instances hosted on multiple regions.
You’ll be able to receive the AWS RDS stop instance name and the Availability Zone from the administrator.
Go to services
Click on Lambda
Click on Create Function
Choose Author from Scratch
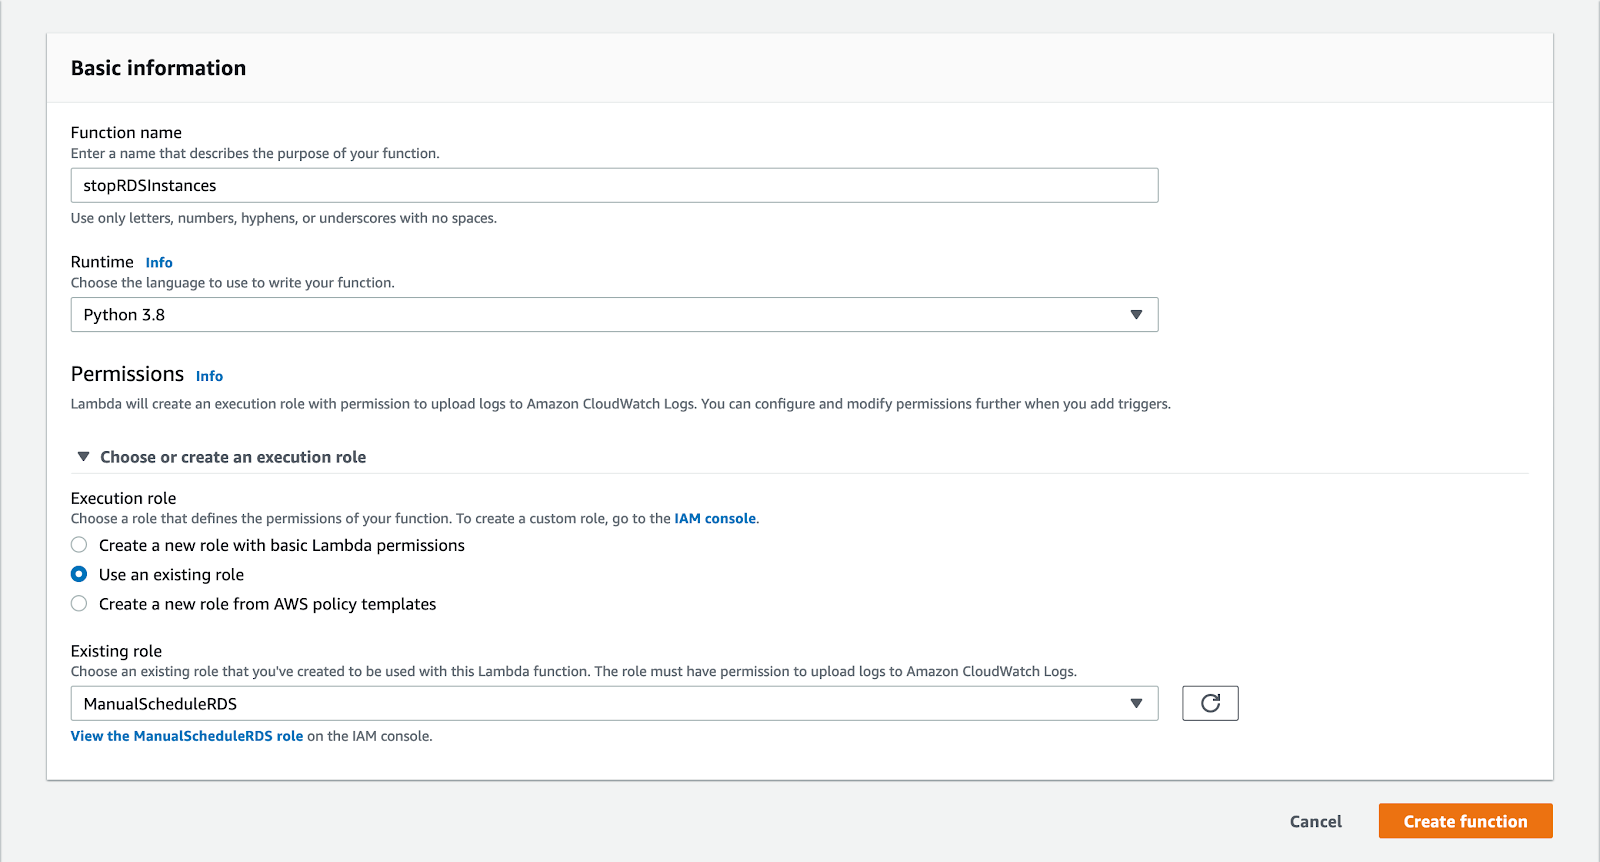
Enter the following information on the window:
Name: StopRDSInstances
Runtime: Python 3.8
Role: Choose an existing role
Role Name: ManualScheduleRDS
Click on Create Function
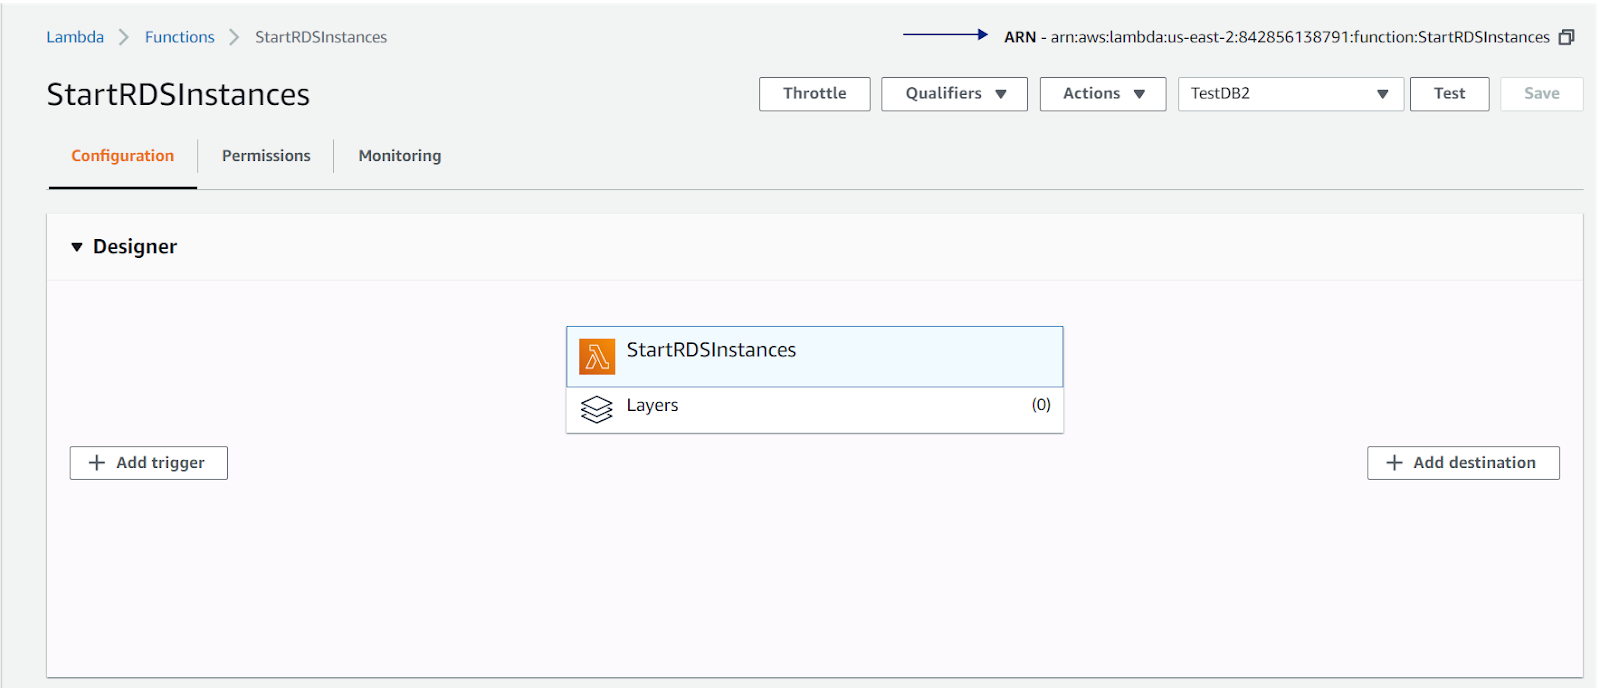
You will find an ARN resource created for the Lambda function in the top right corner. The resource allows the function to access the GetFunctionConfiguration Lambda API and the AWS lambda environment variable.
Now, return to the ManualScheduleRDS role and click on Add Inline Policy.
Assign the ARN on the JSON code and then click Save.
AWS Lambda will now appear as a Resource in the function.
Update the Code
Add the following Python code to the function.
-- CODE language-py line-numbers --
import sys
import botocore
import boto3
from botocore.exceptions import ClientError
def lambda_handler(event, context):
rds = boto3.client('rds')
lambdaFunc = boto3.client('lambda')
print('Trying to get Environment variable')
try:
funcResponse = lambdaFunc.get_function_configuration(
FunctionName='StopRDSInstances'
)
DBinstance = funcResponse['Environment']['Variables']['DBInstanceName']
print('Stopping RDS service for DBInstance : ' + DBinstance)
except ClientError as e:
print(e)
try:
response = rds.stop_db_instance(
DBInstanceIdentifier=DBinstance
)
print('Success :: ')
return response
except ClientError as e:
print(e)
return
{
'message' : "Script execution completed. See Cloudwatch logs for complete output"
}
The line of code responsible for stopping the RDS is rds.stop_db_instance.
The AWS Lambda environment variable, DBInstanceName is held by the variable DBInstance. This environment variable is the key-value pair that will let you use this Lambda function in other environments like Dev, QA or Prod.
Configure the function
Enter the Key-Value pair, DBInstanceName and <userdb instance="" name="">.</userdb>
Set the execution role to ManualScheduleRDS
Save the function
Test the function
Select Test and then Configure Test from above
Select Create New Test Events
Choose the Hello World event template
Save and you’re done! Now you have a Lambda function to stop your RDS instance. If you receive a message saying “Instance<> is not in an available state”, then your DB is not started.
Moving onto Start Functions
The process for setting up the Start function is identical to the Stop function, with most of the changes going to the names and some lines of code.
-- CODE language-py line-numbers --
import sys
import botocore
import boto3
from botocore.exceptions import ClientError
def lambda_handler(event, context):
# TODO implement
rds = boto3.client('rds')
lambdaFunc = boto3.client('lambda')
print('Trying to get Environment variable')
try:
funcResponse = lambdaFunc.get_function_configuration(
FunctionName='StartRDSInstances'
)
#print (funcResponse)
DBinstance = funcResponse['Environment']['Variables']['DBInstanceName']
print('Starting RDS service for DBInstance : ' + DBinstance)
except ClientError as e:
print(e)
try:
response = rds.start_db_instance(
DBInstanceIdentifier=DBinstance
)
print('Success :: ')
return response
except ClientError as e:
print(e)
return
{
'message' : "Script execution completed. See Cloudwatch logs for complete output"
}
Follow the rest of the steps as mentioned earlier.
How to Set the Schedule?
Now that you have the two Lambda functions at your beck and call, you just need to determine when to invoke them. For this, you will have to set a rule on AWS CloudWatch.
Go to CloudWatch
Click on Rules
Choose ‘Schedule’ and then add the Cron expression to choose your time of the day
Add either the start or stop Lambda functions created earlier as the ‘Target’ to invoke
Your scheduled RDS Instance is now ready to go, you need not concern yourself with stopping and restarting your instances anymore.
Migrating from on premise data centers to a cloud provider is always considered a difficult endeavor. From the cost, to the planning and resource allocation, plenty of preliminary work is gone to setting up a cloud infrastructure. Which is why, Microsoft Azure’s new program stands to benefit many organizations still on the fence about migrating to the cloud.
When creating a Kubernetes cluster, scheduling the pod to an available node is an important component of the process. This component works under specific rules and technicalities that I’d like to explore in this article...
It’s important to follow the right individuals so that you remain on the loop and always find yourself learning things that you were unaware of. These thought leaders and influencers can only be the avenues by which you meet other interesting technologists.
At TotalCloud, we’ve been enabling workflow-based cloud management for AWS to make it intuitive, accelerated, and no-code. Instead of programming cloud management use cases or depending on siloed solutions, we built out a platform that gives you building blocks to assemble any cloud management solution.
Kubernetes is a Container-as-a-Service with tons of unique tools to choose from. External tools play a role in integrating with different systems or maintaining control over the clusters you deploy. Manual health checks and troubleshooting is not ideal to keep a system in full health.This list of tools will provide ample support to your containers and have enough configuration to leave management flexible...
Learn how the TotalCloud Inventory Dashboard can become equivalent to your cloud provider’s SDK. Carry out any action on any discovered resource with Inventory Actions.


.png)
.png)
.png)
.png)


.png)